Friday, November 21, 2008

man's dress shirt - reconstruction - deconstructed look

This is a moderate reconstruction of a man's dress shirt that fit just a tiny bit big but not big enough to take all the way apart and put back together again.

Take a boring old man's shirt like this:


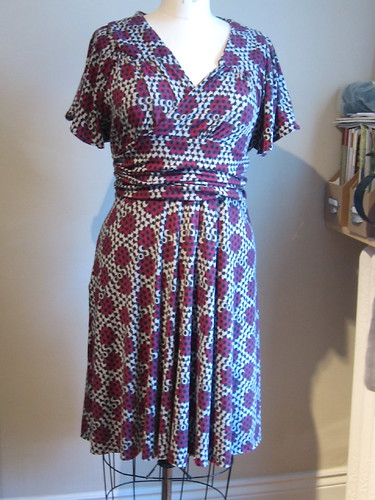
Turn it into a deconstructed semi victorian fitted shirt  like this:


Stuff you will need

  • scissors
  • a sewing machine
  • thread in the color of the shirt or close
  • a needle
  • elastic (thin or small)
  • Lace (optional - I like to salvage lace off other stuff I find)
  • a shirt that fits you as described above
  • chalk 

Phase One

You can use pins or chalk whatever you like and you should be wearing the shirt to make the marks.
Mark across where  the tightest part of where your boobs are (mark A)
Mark under where the curve of boob are (Mark B)
Mark across the center of each boob where it sticks out the most (Mark C)
Mark where you would like your new shirt to land (ish) (Mark E)


Cut off the bottom the shirt you don't need (cut through both sides) as set aside material for later. Start this cut about 2 or 3 inches below the line you made for the bottom of the shirt (Mark E). This 2 or 3 inches is for the ruching and for the hem... so if you use hem tape don't work about it. And the more you leave after the mark the more tucks you will have in the ruching. Next run a temp basting stitch allong the sides seams down the the end of the shirt and take up the left over 2 or three inches for temporary ruching. Do it on both sides.

Now put the  shirt back on and make these marks:

Nip in to the smallest part of your waist and mark it (Mark D)

Make sure the marks are really clear. Take the shirt off and take out the temp ruching.


Phase 2

Cut off the "wings" part of the collar as close as you can. but leave the ring with the top button.
Make a pattern and mark out the ovally front darts. This is how I make the pattern for the front darts. Measure from the edge of the shirt to where you made mark (D). Compare those measurements on both sides and even them up... so if one side was 3.5 inches but the other was 3 inches split the difference and you should get 3.25 inchs... do this on the front and the back to even up your math. Oh, when I am doing this I am only going from the seam to the mark on one side of the shirt. Let's pretend the averaged number was 3 inches. So this is the most fabric I need to get rid of on the front — meaning that I need each diamond to be 1.5 inches across at its fattest point. Now you need to figure out now far down and up each dart needs to go. Measure from B to D and that is the top of the diamond. Lets say for fun it is 6.5 inches. Measure from B to E and that is how tall the total dart is - lets say 10 inches. So the bottom part of the dart is gonna be 3.5 inches. Like this:
 
Now the back dart is made the same way except you make it go all the way up to mark A
The darts in the back should be about 8 inches apart or line up roughly with your shoulderblades.  The darts in the front should line up with mark C. I tried to diagram it here:
  
Try it on and adjust the darts as needed. Remember you are gonna ruch up the sides though! After you are done there are two ways to ruch the sides. You can rebaste, scrunch it up the way you would like and then sew it down.  Or you can do it with elastic. Measure from the top of the side seam to mark E and cut a piece of elastic that long. Sew it to the inside of the shirt while streatching the elastic... there are lots of tutorials on how to do this at places like crafter.org.
Phase Three:
Now lets start the fun stuff. Collar and cuffs With your shirt on mark where the end of your wrist hits... do this with your arms slightly bent... otherwise it will pull alot when you wear it.
  
Now cut off the cuff about .5 to 1 inch above the stiff part of the cuff then cut off and sew uu any extra sleeve detail bits. Cut and sew as close as possible to the existing seams and make sure you can get your hand comfortably through the sleeve.
Now fold back the sleeve until you have it just a tiny bit more than your desired lenght... make sure to do this with the cuff bit you are gonna add back taken into account. 
 
Now pin the hard cuff back on... you will most likely have to add tucks and ruffles at this point. as you bit in the extra bit stick your arm through and see if you like where they land. Adjust as needed and sew on just below the hard bit of the cuff. Trim off any extra to get the desired even deconstructed ruffle effect desired.
As a variation you could also add lace or anything else to the sleeve instead of folding it back.
  
Now for the collar. measure around the collar and then add half again to that number plus one inch. So if my collar was 18 inches the number I would get would be 28 inches. Take the left over material you cut off the bottom. and cut it in 1.5 inch wise strips until you get enough to make up the number you came up with. Run a basting stitch through one edge of the strip you made and ruffle it up like so:
  
Once you have a ruffle you like pin it to the collar of your shirt and sew it on. Watch out for breaking your needles if the fabric has been starched or is way stiff. I like to sew once at the top and once at the bottom of the collar for a nice finished look.  Try your cool new shirt on and trim down the collar to the place you like ... do it in steps other wise you will have to re do the collar. You could also add lace instead of material if you wanted for this step.

 
Feel free to ask any question  and I would love to see anything anyone else has made.

Tuesday, November 18, 2008

Big Cardigan tucked down

  1. Try on the cardy and mark where your shoulders really are in the sweater (not the seams of the sweater's shoulders but your actual shoulders). Also mark where you boobs are — say in three lines to of boob, middle of boob and just under the boob. 
  2. Do the math to figure out how much of the sweater you are gonna have to tuck up to get the shoulder seam to come to the place your shoulder is. Figure out how many tucks you want and mark them out in chalk with a ruler. 
  3. Pin and sew. Keep in mind you can always take more tucks but ripping them out is gonna be a way bigger pain than it will be worth. 
  4. if it is still baggy on the bottom use pins and pull a bit from the back and a bit from the front to find out how much you will have to tuck ... you want to place your front and back tucks about the same place you would find princess seams or darts. Do the math, mark it out and pin it up... try it on before you sew.. and as you tuck.. do one set of tucks, try it on, and keep tucking until you get the fit you want. 
  5. Next, if the sleeves are to big you can tuck them too. With the sweater on mark how much you are gonna have to tuck up as well as were on the sleeve you want the tucks to show. Do the math, mark it out and sew those tucks on up... I am trying to mimic a fairly deep cuff on mine.

Thursday, November 6, 2008

t-shirt revamp - Business goth

This is just one of many t-shirt revamp ideas brought together for this top. Those ideas came from lots of great sources like threadbangers.com and so on.


Step 1 - Put it on and mark it up
  1. Mark the point where you want the V to end at... how much are you gonna show?
  2. Mark the points on the neck line where you want the V to start. These marks will just be guidelines... we will measure to be sure
  3. Use the cloths pins to figure out how much of the sides will need to be taken in. Then mark those places. Keep in mind that if you stress the fabric by trying to get a super tight fit your neck V might turn out funny. Once you get a decent shape in it mark those places  with pins or chalk. Also at this time figure out how long you want your shirt to be.

Step 2 - measure and cut it up

  1. With a measuring tape be sure the mark for the bottom of the V is in the middle of your tee-shirt.
  2. With a measuring tape make sure the marks for the tips of your V are the same distance from the shoulder seams along the collar. Mark the shirt once you are sure where you will cut.
  3. Cut off the neck band but be sure not to cut off the marks, then cut out your V. 
  4. Cut off the sleeves and save them for later.
  5. Cut off the extra from the bottom and save to make your strings for your V. 
  6. Mark out with chalk how you will be taking in the sides. Use your measuring tape to even it up and take the same amount on each side. Pin the sides together on your line and then cut .5 inches outside that mark for seam allowance.

Step 3 - Put it together
  1. First sew up your sides and try it on... adjust the sides as needed
  2. Next take the extra off the bottom and cut a .25" inch strip off  bottom... you should get a big ole loop. Cut the loop so you end up with a little string.You can stretch it out to get it thiner and longer.
  3. Next mark along your V about every .5 of an inch (or less with a ruler making matching marks on both sides of the V.
  4. Slide a cutting mat inside your shirt and use a razor to cut very small horizontal holes for your string.
  5. Next string your collar. And you are done

Variation — New Sleeves option 
  1. Measure from the top seam of your shoulder to your wrist (or where you want the sleeve to end. Measure around your wrist or decide how big you want the sleeve to be at the end.
  2. Take one of the discarded sleeves and cut it open. Then on paper use it to trace a new pattern. Like this. Remember to add extra on the outside to sew it up. 
  3. Sew up the bottom of your sleeve and try it on just to be sure you like it.
  4. Attach you sleeve to your shirt. With the shirt inside out and the sleeve right side out put the sleeve through the arm whole and pin it in place. Like this
  5. Sew it on... repeat with the other arm. 

Thursday, October 23, 2008

Sorta corset from nightmare bridesmaid bodice

So the post below is my master plan for tweaking this bodice I found at a thrift show for $3! As I complete each step I will take photos's too.


Step 1
Put it on and measure the gap where you can’t zip it up (A). Also measure with a tape from armpit (or side seam ) across your bust (B).

Step 2
Carefully trim the zipper off but don’t cut the seam.
Split the last little bit of seam  with a ripper and hand sew to match zipper area as much as possible.
Step 3
Now take lots more measurements and mark up your project. You will need chalk or something to mark the fabric with. Lay the garment flat as if it was zipped up again.
Measure 1” from the edge and mark it (C). Do this to both sides. Next go along the area you just marked and mark the grommet holes, one per inch. Make matching marks on the other side and make very very small grommet holes on both sides.
Step 4
Now measure and make a pattern for your insert. Move the top of the edges apart according to measurement A,  that you took at the beginning and flatten the garment out so it maintains the same lines. Next with a big piece of paper (newspaper will do) layout out paper so it goes about a 1” over the grommet line. Mark this shape and cut it out of your paper.
Step 5
With your insert fabric folded in half line up pattern you made with the folded edge of the fabric. Cut it out allowing enough edge for hemming/finishing. About a half of inch should do. Unless you want to leave it unfinished for a de-constructed look - then leave about a quarter inch. This will give you a ruched looking finish. I used a stretchy fabric as well as this is a poor man’s corset and the main piece doesn’t have a busk.
This is when you might want to finish all the edges on the insert or do your face stitching for the de-constucted look to stop fray and runners later on.
Step 6
Time to open her up and add trim. Now use Measurement B from early on and cut out twice that amount of trim. This is gonna look like way to much but remember that the measurement B was when it was stretched out and you were wearing it and the doubled amount is for the extra ruffle. I am using the same fabric as the insert for a de-constructed small ruffle and so it is easy to install I am cutting the strip so that at least 1.5” will be under the edge of the bodice - I don’t want it bulky and scratchy  . Next fold your trim in half and tack it to the center of your bust like so.
Step 7
now using a needle and thread lightly tack in your ruffles to the facing of the garment keepin' in mind that the piece I am working with stretches when worn and so does my trim... so I am ruffling tighter than I want my end result to be. Also stop as you go and stretch the garment out and be sure you are getting the effect you want. You will sew it more securely a bit later in the project.
Step 8
now sew in your panel. With the garment open pint the panel to the garment leaving plenty of room to clear the grommet holes and sew the strongest seam you can.
With the garment turned inside out repeat on the other side.  The closing seam will be a pain the ass on your machine. Go Slow. Do what you have to by hand.
Step 9
Now turn the garment right side out and cut tiny holes for your grommets through the panel you just installed.  I am using stretchy fabric and I am worried about fray so I am going to “close the edges of the holes with a tiny amount of super  glue before installing my grommets.
Now I am going to follow the instructions on the grommet kit to install them, but I am going to keep a thin towel between the area I am garmenting and the other side of the garment (so I don't’ cut the thing on accident.
Step 10
Next install the lacing and try it on. Tying in the middle of the back. Adjust any of the paneling at this point as well as the ruffle detail. when it works to get in and out of easily measure the lacing and cut and trim. Then sew very very securely so it is one big loop stuck to the grommet like a proper corset. Then sew in your trim more securely. Voila! fancy bodice from 3 dollar thrift store find.

    Tuesday, October 21, 2008

    Kick ass holiday cards

    First
    Get old art magazines (often free on cl or the local street corner)


    Next
    Decoupage (glue) them on to your card and dress them up with old sequins and such.
    Let it dry really well.


    Then 
    Trim out the hanging decoration with an xacto knife leaving a tiny bit attached at top and sides.


    Voila! Write something nice and card specific, add a hook or ribbon to the envelope and
    you are done! Unique meaningful card out of recycled materials and some glue.

    Materials List
    • Heavy Paper - any will do even grocery bags (recycle folks!)
    • Old books and magazines
    • Glue
    • Paint (optional)
    • Old sparklies (often salvaged from clothing or at the center for creative re-use)
    • hooks or ribbon for hangin’